

Every day, millions of professional women spend 8 to 10 hours chained to their office desks.
By 5 PM, suffering from severe lower back pain from sitting all day becomes an exhausting reality. Your neck is a tight knot. Your shoulders are permanently shrugged. A dull, throbbing ache settles into your lower back, and you notice your lower stomach inexplicably protruding.

As someone who spent years glued to a laptop screen, I know this exhausting, relentless pain all too well. For a long time, I brushed it off as standard “corporate burnout.” That was until one morning, I woke up with the room violently spinning, gripped by severe waves of sudden nausea.
A trip to the clinic revealed a harsh, alarming reality: years of poor desk posture had flattened the natural curve of my cervical spine, triggering a condition known as Cervicogenic Dizziness (neck-induced vertigo).
On my journey to reclaiming my health, I tried every conventional medical remedy available, but the results were fleeting:

- TENS Electrotherapy: It provided a temporary numbing sensation, but once the electrical currents stopped, the underlying muscular weaknesses remained completely untouched.
- Massage Therapy: Finding a truly skilled therapist who understands biomechanics is like finding a needle in a haystack. Too often, sessions turned into a painful “battle” between my defensive muscles and the masseuse’s hands, leaving me tighter and sorer the next day.
- Acupuncture: While many swear by it, for someone like me who dreads invasive treatments, the thought of dozens of needles piercing my skin made it an absolute non-starter.
It took months of severe frustration to realize a fundamental baseline truth: the cure must match the cause. Deep core and glute muscles that have “gone to sleep” from prolonged sitting cannot be rubbed, shocked, or needled back to life.
The only permanent solution is Active Rehab (Active Recovery). By using lightweight, female-friendly home fitness equipment, you must actively reactivate weak muscles and restore your body’s natural structural balance.
1. The Mirror Crisis: How Prolonged Sitting Sabotages Your Aesthetic Form and Confidence

Prolonged, static sitting does more than just cause physical pain—it actively alters your physical reflection. In Western fitness and wellness communities, these desk-bound postural distortions have precise biomechanical definitions.
Forward Head Posture & The “Tech Neck Double Chin”
The fatty lump at the base of the neck is clinically known as a Dowager’s Hump (cervical kyphosis). Every single inch your head juts forward to stare at a monitor adds an extra 10 pounds of pressure on your cervical spine.
To survive this strain, the deep muscles at the front of your neck simply shut down, causing skin and tissue to sag into a stubborn “Tech Neck Double Chin”—even if you are at a low body fat percentage. Meanwhile, your side neck muscles (Sternocleidomastoid) and upper traps overcompensate heavily. The result? A “Bulky Neck” appearance and permanently raised shoulders, erasing the elegant, elongated look of a classic swan neck.

Anterior Pelvic Tilt (APT) & The “Fake Belly” Illusion
Have you ever wondered why, despite a clean diet and low body fat, you still have a protruding lower stomach that won’t go away? In women’s fitness communities, this is widely recognized as Anterior Pelvic Tilt (APT), creating a persistent “Fake Belly” illusion.
When you sit for hours, your hip flexors (specifically the psoas muscle) remain in a shortened, tight state, effectively pulling your pelvis forward and downward. Once your pelvis tilts out of its neutral alignment, your abdominal wall relaxes, and your internal organs push forward against gravity. This creates the visual disaster of a faux belly paired with a flattened, sagging glute profile—often called “Pancake Butt.”
The “Defensive Gait” That Kills Your Executive Presence
Chronic back tightness and locked hip joints don’t just stay at your desk—they walk with you into the room. You might notice yourself walking with rounded shoulders, heavy footsteps, or an uncoordinated side-to-side hip sway. In corporate anthropology, this is known as a “Defensive Gait” or a “Slouched Walk.”
Perfect posture is a high-achieving woman’s ultimate form of silent Power Dressing. When you walk into a boardroom slouched and stiff, you aren’t just projecting fatigue; you are actively undermining your executive presence, authority, and natural confidence.
2. The Invisible Danger: How Lower Back Pain From Sitting Explains Deeper Cardiovascular Risks

Beyond the muscular skeletal aches, the systemic danger of a sedentary lifestyle affects your internal cardiovascular health.
📊 Data-Backed Insight
According to extensive clinical studies published by the American Heart Association (AHA), individuals who lead a highly sedentary lifestyle (sitting for more than 8 hours a day) face a two-fold higher risk of developing Cardiovascular Diseases (CVD) compared to active individuals.
When you remain seated, the largest muscle groups in your lower body become completely inert. This structural inactivity causes your metabolic rate to plummet, slows down blood circulation, and increases blood viscosity. Your lower extremities effectively become a stagnant reservoir for venous blood, which not only causes lower-limb edema (water retention) and varicose veins, but also forces your heart to work twice as hard to pump blood back up against gravity.
3. The 20-Minute Active Rehab Protocol: 9 Posture-Saving Exercises
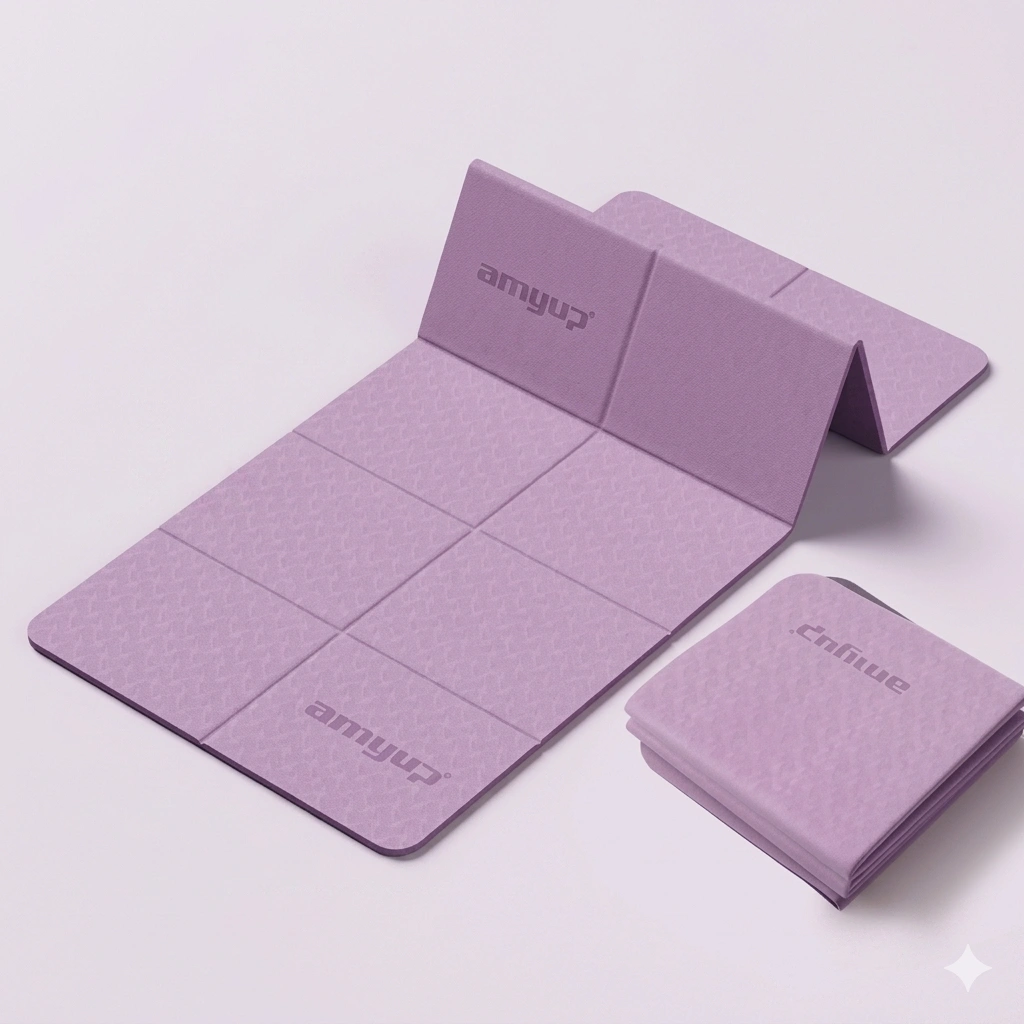
To wake up your dormant muscles and decompress your spine, all you need is an EasyLean High-Density Premium Yoga Mat and an EasyLean Fabric Resistance Band. Focus entirely on precise muscle activation rather than high-intensity sweating.
- Exercise 1: Bird-Dog ─── Spine Neutral Control
- Exercise 2: Dead Bug ─── Deep Core Activation
- Exercise 3: Side Plank ─── Lateral Stability
- Exercise 4: Single-Leg Glute Bridge ─── Wake up “Pancake Butt”
- Exercise 5: Controlled Crunch ─── Reverse “Fake Belly”
- Exercise 6: Banded Hip Hinge ─── Master Hip Hinge
- Exercise 7: Banded Clamshell ─── Stabilize Lateral Pelvis
- Exercise 8: 90/90 Stretch ─── Unlock Rigid Hips
- Exercise 9: Half-Kneeling Stretch ─── Reset Pelvic Tilt
Exercise 1: The Bird-Dog (Spine Neutral Control)

- The Blueprint: Trains the spine’s anti-rotation capability across multiple planes, serving as the absolute foundation of lower back rehab.
- Step-by-Step Instructions:
- Begin on all fours on your EasyLean Yoga Mat, with hands directly under shoulders and knees directly under hips.
- Keep your spine neutral and gently brace your core.
- Slowly extend your left arm forward and your right leg backward simultaneously until parallel to the floor.
- Hold for a brief second, return to center, and repeat. Perform 8–10 repetitions per side for 2 sets.
- ⚠️ Common Mistake to Avoid: Do not kick your leg too high! Arching your lower back defeats the purpose. Focus on absolute stability rather than height.
Exercise 2: The Dead Bug (Deep Core Awakening)

- The Blueprint: Specifically targets and isolates the Transversus Abdominis (TVA)—your body’s deep, built-in structural corset that safeguards your lower back.
- Step-by-Step Instructions:
- Lie flat on your back on the mat, arms pointing straight toward the ceiling, legs raised with knees bent at a sharp 90-degree angle.
- Slowly lower your left arm backward toward the floor while simultaneously extending your right leg straight out.
- Keep both just hovering above the ground, return to the starting position, and alternate sides. Perform 8–10 repetitions per side for 2 sets.
- ⚠️ Common Mistake to Avoid: Keep your lower back completely glued to the floor! If a gap opens up between your lower back and the mat, your core has disengaged. Reduce your leg range of motion to keep your back flat.
Exercise 3: The Side Plank (Lateral Core Reinforcement)

- The Blueprint: Strengthens the lateral stabilizers of your spine (Quadratus Lumborum and Obliques), preventing your pelvis from dropping or swaying when you walk.
- Step-by-Step Instructions:
- Lie on your side on the mat, propping your upper body up on your lower forearm, with your elbow positioned directly underneath your shoulder.
- Drive your hips upward until your head, shoulders, hips, and feet form one perfectly straight line.
- Hold this static position for 15–20 seconds, then switch sides. Complete 2 sets.
- 💡 Modification Tip: If a full straight-leg plank feels too intense on your lower back, drop your knees to a 90-degree bend and perform a modified knee-supported side plank. It targets the same stabilizers safely.
Exercise 4: The Single-Leg Glute Bridge (Rebuilding Your Spine’s Foundation)

- The Blueprint: Your glutes are the primary shock absorbers for your lower back. Unilateral (single-leg) training corrects muscular imbalances between your left and right side.
- Step-by-Step Instructions:
- Lie flat on your back with your left knee bent and foot flat on the mat. Extend your right leg straight up.
- Drive through your left heel and squeeze your left glute hard to lift your hips toward the ceiling until your knee, hip, and shoulder form a straight line.
- Hold the peak contraction for 1–2 seconds, lower down slowly until your glutes lightly brush the mat, and instantly drive back up. Perform 10–12 reps per side for 2 sets.
- ⚠️ Common Mistake to Avoid: Make sure you are lifting with your butt, not hyper-extending your lower back! If you feel an ache in your lower spine after this, drop back down to a standard two-legged glute bridge.
Exercise 5: The Controlled Crunch (Flattening the Anterior Flare)

- The Blueprint: Builds foundational strength in the rectus abdominis, helping to pull your ribcage down and correcting that awkward, over-extended posture.
- Step-by-Step Instructions:
- Lie on your back with knees bent and feet flat on the floor. Place your fingertips lightly behind your ears.
- Engage your upper abs to lift your head, neck, and shoulders slowly off the mat. Your shoulder blades should just clear the floor.
- Lower down under control. Repeat for 12–15 repetitions for 2 sets.
- ⚠️ Common Mistake to Avoid: Never pull or yank your head up with your hands! This places immense strain on your cervical spine. Keep your lower back firmly pressed into the floor throughout the movement.
Exercise 6: The Banded Hip Hinge / RDL (Learning to Move Safely)

- The Blueprint: Teaches your nervous system how to execute a perfect Hip Hinge. This ensures you use your powerful glutes and hamstrings rather than your vulnerable lower back during daily tasks.
- Step-by-Step Instructions:
- Stand tall, stepping on the middle of your EasyLean Fabric Resistance Band, and hold the loops firmly with both hands.
- Keeping a soft bend in your knees, push your hips straight back as if trying to touch a wall behind you with your glutes. Keep your spine flat.
- Lower your torso until you feel a deep, clean stretch along your hamstrings, then squeeze your glutes hard to drive your hips forward and stand tall. Do 12–15 reps for 2 sets.
- 🛒 Brand Integration: The EasyLean Fabric Resistance Band is meticulously woven for women; its anti-slip, gentle resistance provides the exact tactile feedback required to safely activate the posterior chain without overloading the spine.
Exercise 7: The Banded Side Plank Clamshell (Fixing Pelvic Sway)

- The Blueprint: Targets the Gluteus Medius (side glutes). When this muscle is weak, your pelvis drops laterally with every step you take, culminating in severe lower back fatigue.
- Step-by-Step Instructions:
- Place your EasyLean Resistance Band just above both knees and assume a modified side plank position (knees bent at 90 degrees, resting on your forearm).
- Lift your hips up into a straight line. While keeping your feet glued together, slowly open your top knee outward against the band’s resistance like a clamshell.
- Lower your knee slowly without letting your hips sag. Complete 8–10 controlled reps per side for 2 sets.
- ⚠️ Common Mistake to Avoid: Do not let your torso or pelvis rotate backward as you open your knee. Your hips must remain perfectly stacked and facing forward.
Exercise 8: The 90/90 Hip Mobility Stretch (Releasing Spine Compensation)

- The Blueprint: When your hips are rigid from sitting, they lose their ability to rotate. Your body then forces your lower back (lumbar spine) to rotate instead—a joint structurally built for stability, not rotation. This is the hidden culprit behind most office back pain.
- Step-by-Step Instructions:
- Sit on the floor. Position your lead leg flat on the ground at a 90-degree angle directly in front of you. Position your trail leg flat on the ground at a 90-degree angle to your side.
- Keep your spine as tall and upright as possible, placing your hands on either side of your hips for support.
- Gently shift your center of gravity forward over your front shin until you feel a deep opening in the hip socket. Spend 60 seconds per side for 2 sets.
Exercise 9: The Half-Kneeling Hip Flexor Reset (Undoing the Pelvic Tilt)

- The Blueprint: Targets and elongates the chronically shortened psoas and rectus femoris muscles, releasing the forward pull on your pelvis and instantly dropping lower back compression.
- Step-by-Step Instructions:
- Come into a half-kneeling position on your mat, with your right knee on the ground directly beneath your hip and your left foot flat in front of you at a 90-degree angle.
- Crucial Setup Step: Squeeze your right glute tightly and tuck your tailbone slightly under (posterior pelvic tilt).
- Keeping your torso perfectly upright, shift your weight forward by a mere two inches until you feel an intense stretch at the front of your right hip. Hold for 30–45 seconds, then switch sides. Complete 2 sets.
- ⚠️ Common Mistake to Avoid: Never arch your lower back or lean your chest forward! Arching your back completely bypasses the hip flexor and compresses your lumbar joints, making your back pain worse.
4. Five Non-Negotiable “Pain-Free Living Rules” for the Modern Professional
Relying on a 20-minute evening workout is not enough if you spend the remaining 23 hours damaging your body. Based on my personal medical rehabilitation journey, these five lifestyle protocols are completely non-negotiable:
📋 Your Daily Structural Maintenance Checklist

- 1. The 30-Minute Micro-Break Rule (“Exercise Snacking”)
- Stand up every 30 minutes.
- Walk around for 2–3 minutes.
- Keep joint tissues continuously lubricated.
- 2. Commit to Low-Impact Cardio (Backstroke Swimming)
- Avoid violent running and jumping.
- Use water buoyancy to remove gravity.
- Unwind cramped neck muscles naturally.
- 3. Eradicate High Pillows; Switch to a Cervical Support Pillow
- High pillows compress your night airway.
- High support forces muscles to work all night.
- Switch to contoured cervical pillow profiles.
- 4. Protect Your Neck from Cold Air and AC Drafts
- Cold drafts trigger rapid vessel constriction.
- Cold triggers immediate acute muscle spasms.
- Keep a lightweight desk scarf nearby.
- 5. Optimize Your Smartphone Posture (Eye-Level Rule)
- Low-angle text neck doubles head weight.
- Elevate devices up to direct eye level.
- Enforce strict duration limits on scrolling.
5. Frequently Asked Questions

Q: Why do you advise against immediate massage or TENS electrotherapy for office back pain?
A: Massage and electrotherapy fall under passive therapies. They are wonderful for providing short-term pain relief by temporarily relaxing a cramped muscle or masking nerve pain. However, because they do absolutely nothing to rebuild strength in your dormant core or “sleeping” glutes, the exact same structural imbalances will pull your spine right back out of alignment the moment you sit down at your desk the next morning. True, lasting recovery requires Active Rehab—you must train the weak muscles to do their job.
Q: Why do I feel deep lower back soreness instead of my glutes burning when I do glute bridges or squats?
A: This is a classic symptom of Glute Amnesia (Dead Butt Syndrome). Because your brain has spent years keeping your glutes completely inactive while sitting, it has literally lost the neural pathways required to fire them efficiently. As a consequence, your nervous system forces your lower back muscles to take over the heavy lifting.
If this happens, stop the exercise immediately. Spend a few days focusing entirely on Exercise 9 (The Hip Flexor Stretch) to release the tight anterior muscles holding your pelvis hostage, then restart with basic, two-legged static bridges, focusing entirely on mindfully contracting your glutes at the top.
Final Thoughts
Overcoming sedentary injuries requires shifting our mindset away from temporary passive fixes and toward intentional, active daily self-care. At EasyLean, we design elegant, high-utility home fitness essentials that seamlessly fit into the busy lives of modern women. Your health, your aesthetic form, and your professional confidence should never have to be sacrificed for a paycheck.
【Disclaimer】: The health, fitness, and rehabilitation information provided in this article is for educational and informational purposes only and should not be construed as medical advice. Always consult with a qualified healthcare professional or physical therapist before starting any new exercise regimen, especially if you have a pre-existing medical condition like a herniated disc or are experiencing acute pain.
Leave a Comment
You must be logged in to post a comment.